How to Distress Jeans: Easy Steps for a Stylish Look!
Wondering how to distress jeans? If you want to make your old jeans look cool and trendy, distressing them is a fun way to do it! Distressing jeans is a simple way to add a unique touch and make them look stylish and worn in. You can do this at home with just a few tools and a bit of creativity.
If you’re asking how to distress jeans, you’ve come to the right place! In this post, we will show you easy steps to get the perfect distressed look. Whether you want small rips or big holes, we’ve got you covered with simple tips and tricks to make your jeans look awesome!
How to Distress Jeans in Simple Steps
Distressing jeans is an easy way to give your old denim a fresh, trendy look. If you’re wondering how to distress jeans, you can follow a few simple steps to create the perfect worn-in style. First, gather your tools like scissors, sandpaper, and a razor blade. These tools help you make rips, frays, and faded spots on your jeans. It’s easy to do, and you can do it at home!
Start by marking where you want the distressing to happen. You can make small holes or bigger rips depending on your style. Be careful with how much you cut or sand, so your jeans don’t tear too much. Once you’ve marked the spots, start cutting or using sandpaper. It’s fun and easy!
What You Need to Distress Jeans at Home
Before you start, you need a few things to distress jeans properly. To begin with, gather sharp scissors, a razor blade, and some sandpaper. You can use these tools to create the distressed look you want. You can also use a cheese grater or a pumice stone if you want to add more texture. These tools are simple to use, and you’ll find them at home or in a craft store.
Next, you will need a pair of old jeans that you don’t mind transforming. Choosing the right pair is key, so make sure they fit well and are made of sturdy denim. The distressing process is easier and looks better on jeans that are already worn or faded. You’re ready to start once you have your tools and jeans!
Step-by-Step Guide: How to Distress Jeans
Distressing jeans is a simple way to give them a trendy, worn-out look. Here’s a quick guide to help you distress your jeans in 5 easy steps.
- Gather Your Tools
Start by gathering the tools you’ll need: sharp scissors, sandpaper, a razor blade, and fabric markers. These tools will help you create rips, frays, and faded spots on your jeans. - Mark the Areas to Distress
Use fabric markers to mark where you want the distressing. Common areas to distress are the knees, thighs, and pockets. Make sure to plan your cuts and frays before you start. - Cut Small Slits
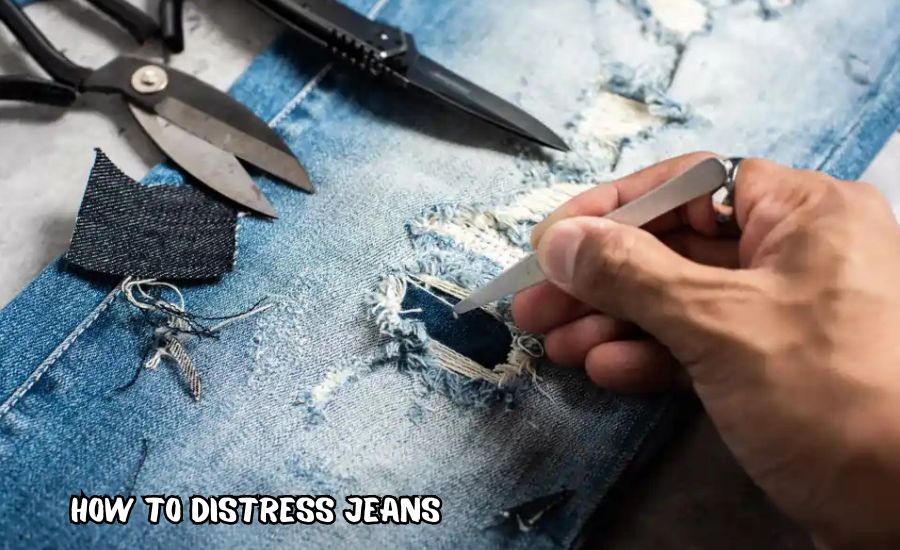
Use the scissors or a razor blade to carefully make small slits where you marked. Don’t cut too much at once; it’s better to start small and add more if needed. - Fray the Edges
Take sandpaper or a pumice stone and gently rub the edges of the cuts. This will create a frayed, worn-in look. Keep rubbing until you like the texture. - Wash Your Jeans
After you finish distressing, wash your jeans to soften the fabric and make the distressing look more natural. Let them dry, and you’re all set with your stylish, custom distressed jeans!
How to Distress Jeans Without Messing Them Up

When learning how to distress jeans, it’s important to avoid making mistakes. One of the easiest ways to mess up your jeans is by cutting or sanding too much. To prevent this, start with small cuts or frays. You can always add more later if you want a bigger distressed effect. It’s better to take your time and check your work than rush through it.
Additionally, remember to always work on a flat surface. This way, you can easily see what you’re doing and control where you place the rips. If you’re using scissors, make sure they are sharp enough to cut through the denim easily. Using dull scissors can cause uneven cuts that may ruin the look.
How to Distress Jeans for a Casual Look
If you want to know how to distress jeans for a casual, everyday look, start by making small, subtle rips. The idea is to give your jeans a slightly worn-in appearance without going overboard. Focus on distressing areas like the knees or around the pockets. These areas tend to get worn naturally, so you don’t need to do much to make them look good.
After making small rips, rub the edges with sandpaper to make them fray. This will add to the casual, laid-back vibe. You don’t want your jeans to look too perfect, so avoid creating perfect holes. Keep it natural, and remember less is more for a relaxed, casual look.
How to Distress Jeans with Scissors for Quick Rips
Want to distress jeans fast? Using scissors is one of the easiest ways to create rips. To get started, grab a pair of sharp scissors and mark where you want your rips. A common area to distress is around the knees, but you can also cut along the thighs or pockets. Cut small slits and make sure the cuts are even.
Once the rips are cut, you can fray the edges by using your fingers or sandpaper. Rubbing the edges gently will make the rips look more natural. This quick method is perfect if you’re in a rush but still want to make your jeans look stylish!
How to Distress Jeans Using Sandpaper
Sandpaper is a great tool to use when learning how to distress jeans. It’s perfect for creating faded spots and rough edges. Start by rubbing the sandpaper gently on the areas where you want to add distress. Common areas include the knees, thighs, or pockets. Sanding the fabric creates a worn, faded effect that makes the jeans look like they’ve been through a lot.
You can also use sandpaper to fray the edges of small rips. Gently rub the edges of the holes you’ve already cut, and this will create a nice, frayed look. Make sure to check your progress frequently to avoid over-sanding the fabric.
How to Distress Jeans with a Razor Blade for a Sharp Look

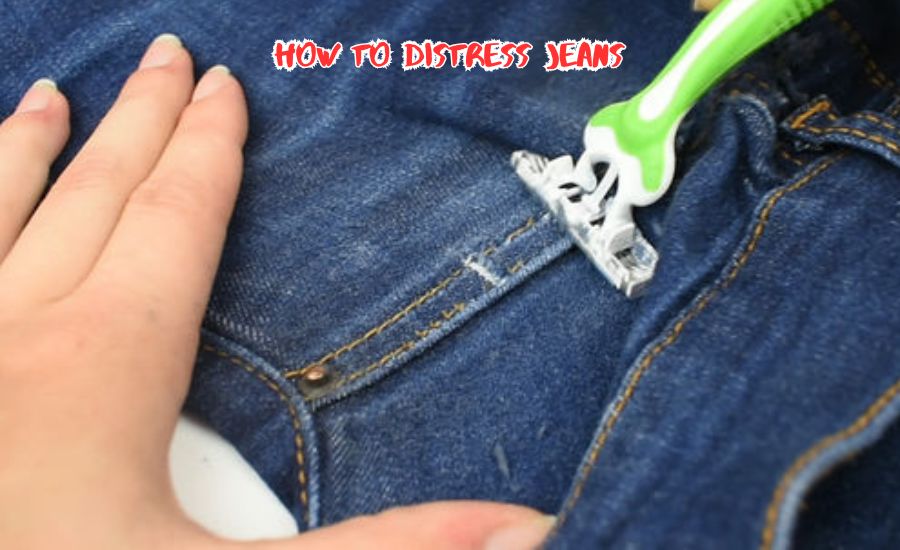
If you’re after a sharp, edgy look, a razor blade is a great tool for distressing jeans. To begin, gently scrape the razor blade over the areas where you want to add distress. Focus on areas like the knees and thighs, and be careful not to cut through the fabric too much. The razor blade works by creating small frays and faded spots on the denim.
After using the razor blade, you can use sandpaper to smooth out the edges and make them fray. This method will give your jeans a cool, sharp look that’s perfect for anyone who loves a more intense distressed style. Always handle the razor carefully to avoid accidents.
How to Distress Jeans with a Cheese Grater
If you’re looking for a fun way to distress jeans, try using a cheese grater! This method is great for creating a soft, worn-in texture. Simply rub the cheese grater against the fabric in small circles to wear down the denim. Focus on the knees or pockets for a more natural look.
The cheese grater works by lightly shredding the fibers in the fabric. You can combine this technique with sandpaper to create a more frayed and distressed look. This method is fun and easy to do at home, and you don’t need a lot of tools to get started.
How to Distress Jeans for a Personalized Style
Every person has a unique style, and distressing jeans is the perfect way to show it off! To create a personalized look, think about where you want to add distress. You can make small, subtle rips for a more classic look, or you can go for bigger, bolder holes if you prefer a more dramatic style.
Add some details to make your jeans truly yours. For example, you can distress the back pockets, or add a few rips along the sides. The more creative you get, the more your jeans will reflect your personality. Let your imagination run wild as you create your perfect distressed look!
How to Distress Jeans Without Ruining Them
When learning how to distress jeans, it’s important to avoid making big mistakes that could ruin your favorite pair. To keep your jeans from being ruined, start slowly and carefully. Don’t rush the distressing process, and always check your work before cutting or sanding more. You can always add more distress later if you feel it needs more.
Also, use a soft touch when using tools like sandpaper or a razor blade. Pressing too hard can cause the fabric to tear too much or become uneven. Start with a light touch and increase the intensity as needed.
How to Distress Jeans and Make Them Look Authentic

Authentic distressed jeans look natural, as though they’ve been worn for years. To achieve this look, try distressing areas that would naturally get worn out, like the knees and pockets. Make small cuts and rub the edges with sandpaper to give the rips a worn-in look. Avoid making perfect cuts or holes, as that can look fake.
You can also fade parts of the denim to add to the authentic feel. To do this, use sandpaper or a razor blade to rub down the fabric until it starts to fade. This will help make your jeans look like they’ve been through plenty of adventures!
How to Distress Jeans for a Fashionable Look
Distressed jeans are a fashionable trend, and you can make them your own! To distress jeans for a fashionable look, focus on creating stylish rips. A popular place to add distress is around the knees. However, you can also add rips along the pockets or thighs for a more bold look.
After making the rips, make sure to fray the edges using sandpaper or your fingers. This will add texture and style to your jeans, making them look fresh and trendy. Whether you want subtle distressing or dramatic rips, you can make your jeans look stylish with a little creativity.
How to Distress Jeans for the Perfect Fit
When learning how to distress jeans, remember to think about the fit. Distressed jeans should still fit comfortably, so avoid cutting too much or making rips in places that could make the jeans uncomfortable to wear. Focus on the areas that naturally wear out, like the knees and pockets. These areas will give your jeans a cool, worn-in look without sacrificing comfort.
Finally, wash the jeans after distressing them. This will help soften the fabric and make the rips look even better. You now have the perfect fit and the perfect distressed look!
Conclusion
Learning how to distress jeans is a fun and easy way to make your old jeans look new again! You don’t need to be an expert to do it; just follow the simple steps, and you can create cool rips and frays in no time. Whether you use scissors, sandpaper, or a razor blade, it’s all about getting creative and making your jeans reflect your personal style. Remember, start small and add more if needed!
So, next time you look at your jeans and want to give them a fresh look, you’ll know exactly how to distress jeans. With a little patience and the right tools, you can turn any old pair into a stylish fashion statement. Have fun with it and enjoy wearing your new, custom distressed jeans!
Explore Further: Yetithejewelwer
FAQs
Q: How do I start distressing jeans?
A: Begin by gathering your tools like scissors, sandpaper, and a razor blade. Then, mark where you want the rips or frays and carefully cut or sand those areas.
Q: What tools do I need to distress jeans?
A: You will need sharp scissors, sandpaper, a razor blade, and optionally a cheese grater or pumice stone for additional texture.
Q: Can I distress jeans without cutting them?
A: Yes! You can use sandpaper or a razor blade to create faded spots and rough edges without cutting the fabric.
Q: How can I make small rips in jeans?
A: Use sharp scissors or a razor blade to carefully cut small slits where you want the rips, then rub the edges with sandpaper to fray them.
Q: Can I distress new jeans?
A: Yes, you can distress new jeans! Just make sure to take it slow and avoid overdoing it, so the fabric doesn’t tear too much.
Q: How can I make the distressing look more natural?
A: Focus on areas that naturally wear out, like the knees and pockets. Make small, uneven rips and use sandpaper to make them frayed and worn.
Q: How do I prevent over-distressing my jeans?
A: Start with small cuts or sanding and check your progress frequently. You can always add more distress later, but you can’t undo it.
Q: Should I wash my jeans after distressing?
A: Yes, washing your jeans after distressing helps soften the fabric and makes the distressing look more natural and worn-in.


Post Comment